This article explains how applicants move through Apply, from registration to submitting a complete application. Understanding this flow will help you support applicants and interpret their applications in the University View.
The journey has two sequential sections; Your Information and the Application, followed by submission. Applicants can apply to up to six programme choices within a single application.
How the journey is structured- Your Information – the first stage, capturing core details about the applicant and their intended programme choices.
- Application – the detailed form, unlocked once Your Information is complete.
- Submission – available once all tasks are complete and the applicant's account is verified.
An applicant's Fee Status (Home or Overseas) shapes their whole journey – it controls which fields and questions they see. It's set in the Your Information section and can be changed before submission.
1. Your Information sectionThis is the first mandatory stage, capturing the essential details that define the applicant's profile and programme choices.
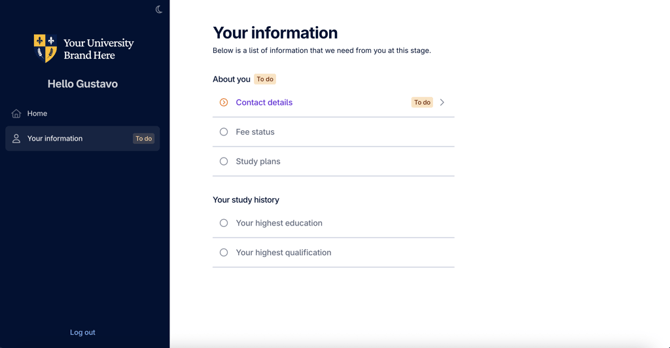
- It must be completed in order – tasks unlock sequentially.
- It must be fully completed before the Application section unlocks.
The key tasks are:
- Contact details – basic personal information.
- Fee status – sets the applicant as Home or Overseas. This drives the conditional logic across the whole journey.
- Programme choices – the applicant can add and rank up to six programmes (by intake, level, mode and course).
- Your highest study – details of their most advanced education and qualifications.
What you'll see: once an applicant completes this section, an entry is created for each programme choice and made available to you, with all details shown in the Applicant File.
2. Application sectionOnce Your Information is complete, the Application section unlocks in the main navigation. This captures the detailed information you need to assess the applicant.
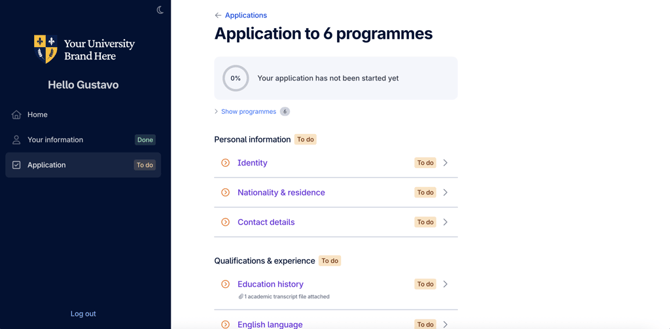
- Unlike the first section, tasks here can be completed in any order.
The tasks are grouped into:
- Personal information – identity, nationality & residence, contact details.
- Qualifications and experience – education history, English language, employment.
- Supporting information – references, personal statement, funding, immigration history.
- About your application – diversity & inclusion, representation, referral, declarations.
- Consents – information processing, privacy policy, terms & conditions, accuracy of data.
How Fee Status affects this section:
- It shows or hides specific fields – for example, Student Loans Company questions for Home applicants, or UK address details for Overseas applicants.
If an applicant changes their Fee Status: they can do this any time before submission, but it will invalidate completed tasks, which must then be re-completed to ensure the right fields are shown and the data stays correct.
Applying to multiple programmes:
- Application-level tasks (such as identity, education history and English language) are completed once and shared across all programme choices.
- Applicants don't repeat these tasks for each choice.
The Submit application button is enabled only once every task in the Application section is complete and the applicant's account is verified.
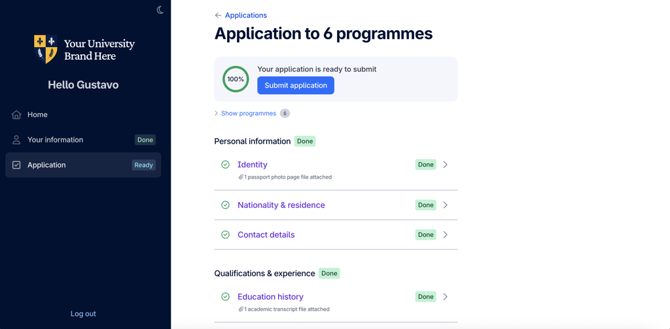
What happens at submission:
- The application is sent to the university and the applicant sees a confirmation message.
- A separate record is created for each programme choice (up to six).
- Both the Your Information and Application sections are permanently locked – no further edits or uploads are possible.
- The application status changes to Sent.
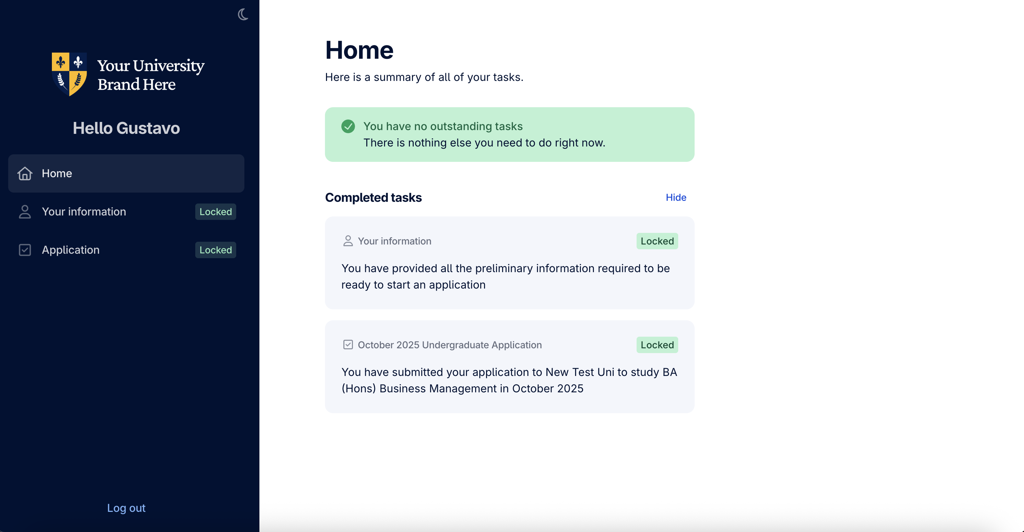
- The applicant's home page shows a “No Outstanding Tasks” message until the university triggers a new section (for example, an Offer).
This article explains the Your Information section – the first stage of an applicant's journey in Apply. It captures the applicant's core details, sets their fee status, and unlocks the main Application section. Understanding it will help you support applicants through this stage and interpret the information they provide.
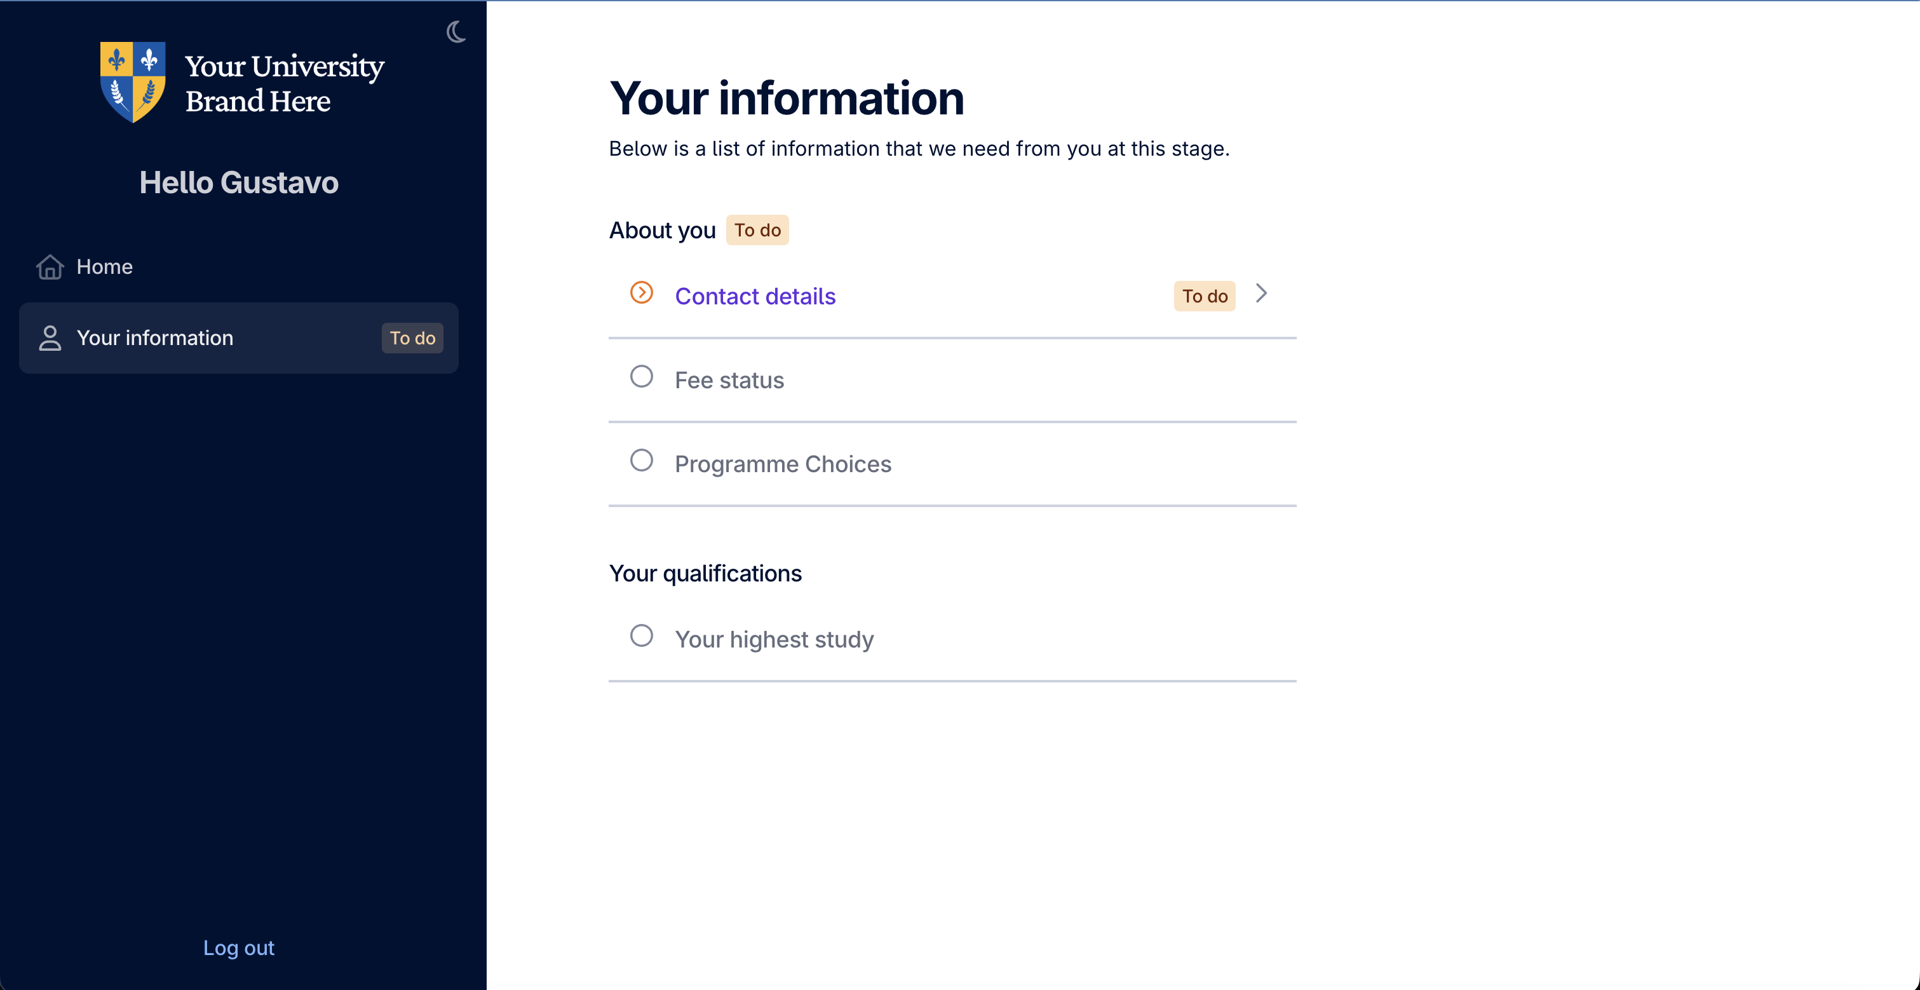
- Tasks must be completed in sequence – each one unlocks the next (for example, Fee Status only becomes available once Contact Details is complete).
- All four tasks must be completed before the Application section unlocks.
The four tasks are:
- Contact details
- Fee status
- Programme choices
- Your highest study
1. Contact details
Captures the applicant's contact information and key personal details, giving the university a reliable way to reach them.
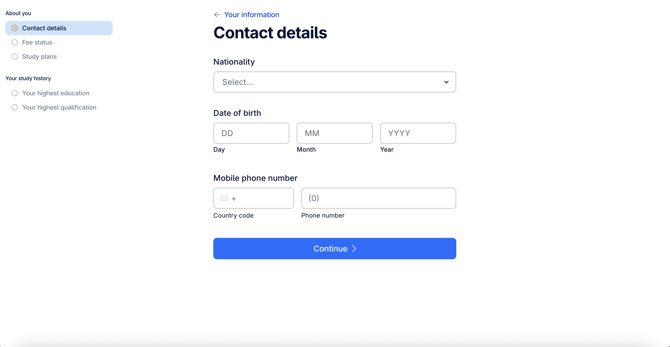
Fields:
- Nationality
- Date of birth
- Mobile phone number (in addition to the email provided at registration)
On completing this task, the applicant moves on to Fee status.
2. Fee status
The applicant selects their own fee status. This is the single most important choice in the section – it sets their tuition fee category and application route, and shapes the courses, fields and tasks they'll see for the rest of the journey.
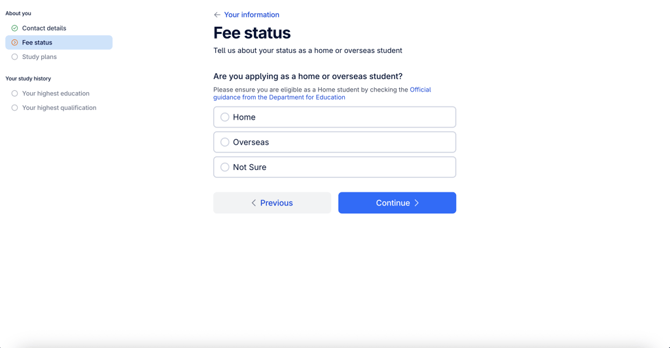
Options:
- Home
- Overseas
- Not sure – treated as Overseas for all purposes
To help applicants decide, the task links to the official Department for Education guidance on fee eligibility.
If an applicant changes their fee status: they can do this any time before submitting, but it has knock-on effects worth understanding when supporting them
• All later tasks in both Your Information and the Application section are invalidated and must be completed again.
• This ensures the correct fields are shown for the new fee status.
• Their previous answers are pre-filled when they re-attempt the tasks, so it's a case of checking and correcting rather than starting over.
• If the Application section was already visible, it's hidden until they finish re-completing the Your Information tasks.
3. Programme choices
Captures the programmes the applicant wants to study. They can add and rank up to six choices in a single application.
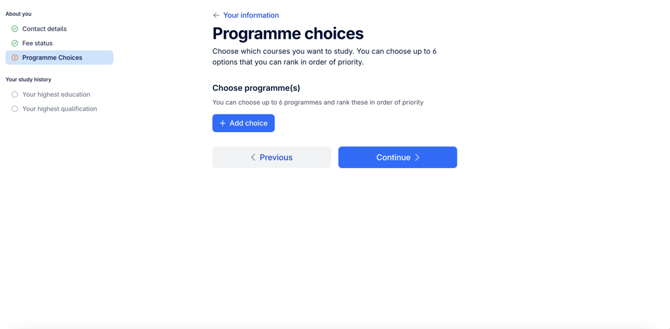
Each choice is built from four fields, selected in order (each filtered by the previous one, and by the applicant's fee status):
- Intake
- Intended level of study
- Mode
- Course
Applicants only see the intakes, levels, modes and courses available for their fee status – Home applicants see Home options, Overseas (and “Not sure”) applicants see Overseas options.
Courses with multiple entry years appear as separate options, with the year shown in brackets – e.g. BA (Hons) Business Management (Year 1) and BA (Hons) Business Management (Year 2).
How applicants add choices:
- Select Add choice and enter the programme details.
- Added choices appear in a ranked list, where the applicant can edit, delete, or re-rank them (move up or down).
- After the first, the button becomes Add another choice.
- At six choices, the applicant sees “You have reached the maximum of 6 programme choices” and the add button is hidden.
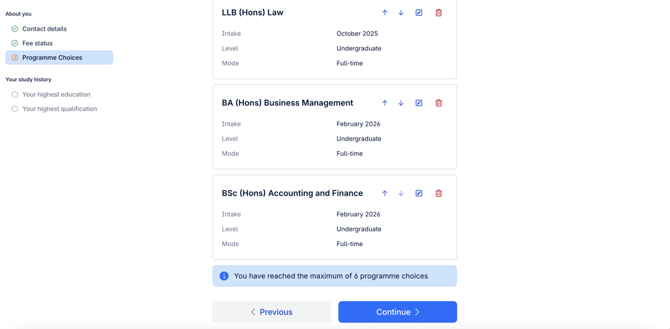
What's required:
- At least one programme choice is needed to complete the task.
- Duplicate choices (the same intake, level, mode and course) aren't allowed.
4. Your highest study
Captures the applicant's highest level of education and qualifications, through a three-step process. All three steps must be completed for the task to be marked complete.
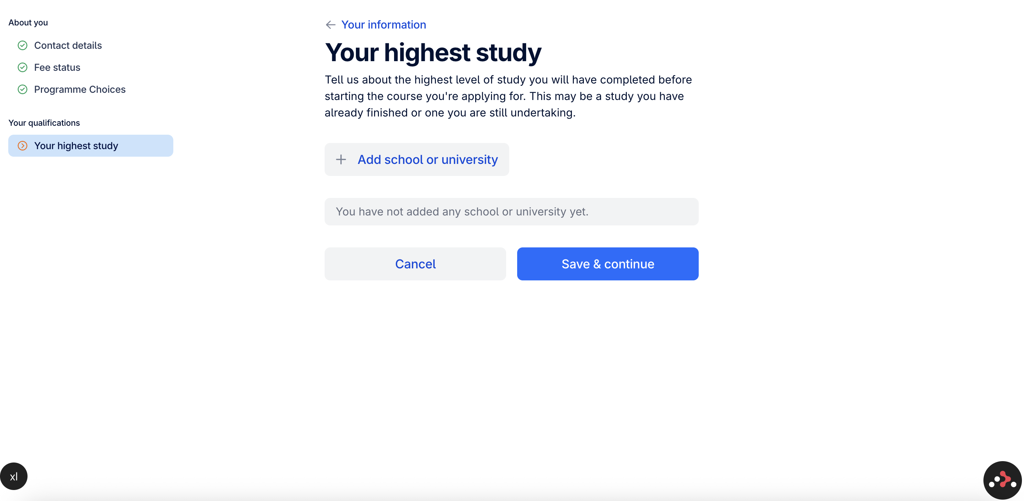
Step 1 – Add school or university
- Select Add school or university and enter: Country, Institution name, Institution address.
- The country selected determines which qualification types, grading systems and awarding organisations are available in the next steps.
- At least one institution must be added before the applicant can continue.
Step 2 – Add study
Select Add study to record what the applicant studied at that institution.
- Fields: File upload (optional), Qualification type, Grading system, Results type (Final / Predicted / No results yet), and “Taught and assessed in English?” (shown only when the country is not the United Kingdom).
The Results type matters:
• Final – grades are stored as final.
• Predicted – grades are stored as predicted and shown with a (predicted) label.
• No results yet – grade, date and awarding organisation are set to Pending and locked.
- Applicants can add multiple qualification types under the same study.
Step 3 – Add qualification
Select Add qualification to add at least one qualification to each study.
- Fields: Subject, Grade, Qualification date, Awarding organisation, Modules (optional).
- If No results yet was chosen in Step 2, the grade, date and awarding organisation are auto-filled as Pending and locked.
- Applicants can Save & complete, or Save & add another to add more qualifications to the same study.
Some fields above may not appear for every qualification – which fields show depends on the qualification type selected.
Completing the sectionOnce all four tasks are complete:
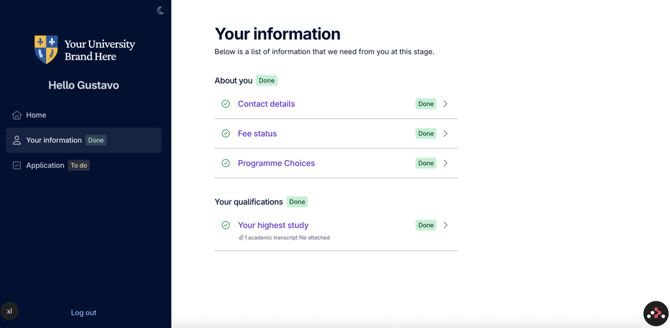
- The Application section unlocks for the applicant.
- The application is set up with the programme(s) chosen in the Programme choices task.
- An entry is created and shown to you in the University View for each chosen programme, so you can see the applicant's details at this early stage.
This article explains the Application section – the detailed stage that unlocks once Your Information is complete. It captures the comprehensive information the university needs to assess an applicant. Understanding the tasks will help you support applicants and review their submitted applications.
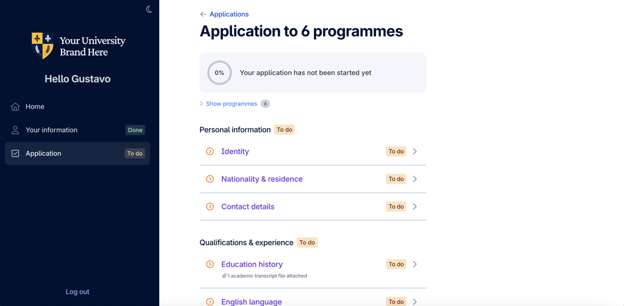
- Tasks can be completed in any order – they don't need to be done in sequence.
- Some fields appear only based on the applicant's fee status (Home or Overseas), set earlier in Your Information.
Applying to multiple programmes: when an applicant has more than one programme choice (up to six), the tasks in this section are completed once and shared across all choices – they aren't repeated for each. A separate record is created for each programme choice on submission.
1. Identity
Collects the applicant's personal details and official identification.
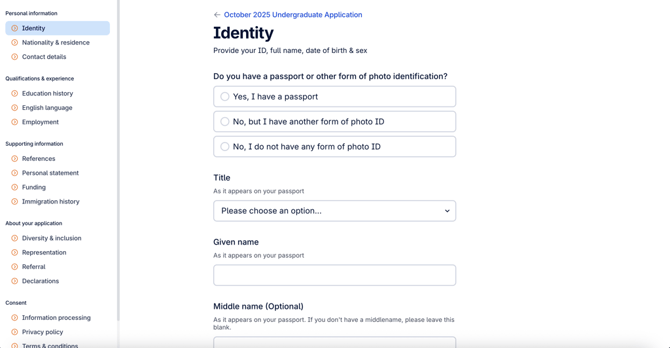
- Fields: Title, given name, middle name (optional), family name, legal sex, and previous names.
- ID verification: the applicant is asked whether they have a passport or other photo ID. If passport, passport number, issue/expiry dates and place of issue are required, with an optional passport upload. If another form of photo ID, an optional upload is available.
2. Nationality & residence
Confirms and collects nationality, citizenship and residency history.
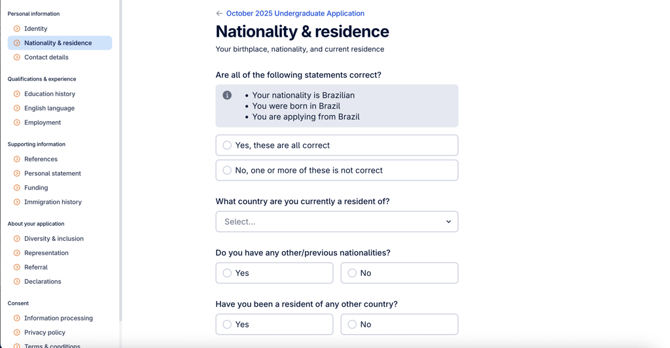
- Nationality, country of birth and country of application are pre-filled from the Your Information contact details, and the applicant confirms whether these are correct (if not, the fields become editable).
- Applicants can add other or previous nationalities, and other countries of residence (with the year their current unbroken period of residence began).
- If the applicant's country of residence is the United Kingdom, additional fields appear for their UK residence category (e.g. UK citizen, settled status, refugee) and UK area.
The “country you are currently a resident of” field is shared with the Contact details task – changing it in one place updates it in the other.
3. Contact details
Collects the applicant's current contact information. What's shown depends on their fee status.
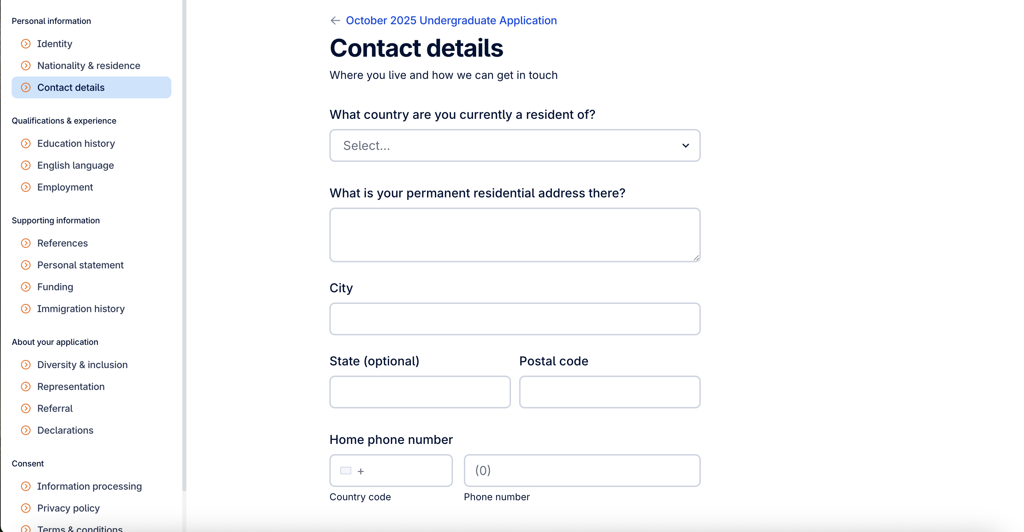
- Home applicants: asked whether their permanent address is the same during term-time. If not, they provide a term-time address and accommodation type.
- Overseas applicants: asked whether they know where they'll be living in the UK. If yes, they provide a UK address, accommodation type and an optional UK phone number.
4. Education history
Lets applicants record their full academic background beyond their highest study, so the university has a complete picture.
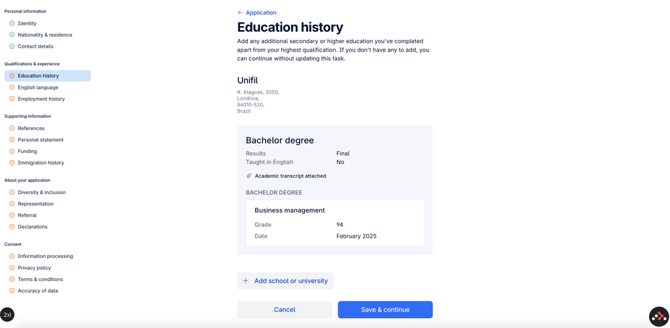
- The entry from Your Information > Your highest study is automatically carried over as the first entry and cannot be edited or deleted here – this keeps the data consistent.
- Applicants can add any number of further education entries.
- Each entry follows the same three steps as Your highest study: add the institution, add the study, and add at least one qualification.
Each education entry must include at least one qualification before the task can be completed.
5. English language
Captures how the applicant meets the English language requirement – either by a test or an alternative method.
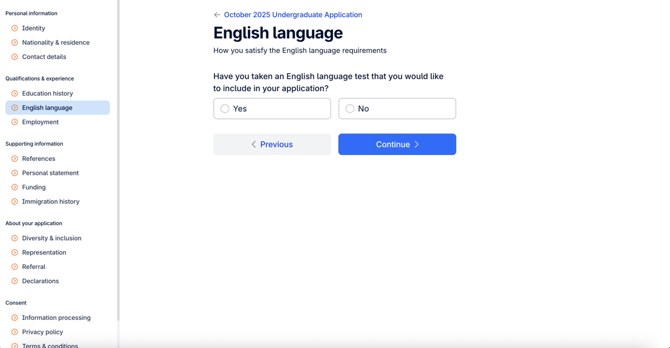
- If they've taken a test: they select the test type (IELTS, PTE, TOEFL, the university's own test, or other) and provide the reference number, score, date taken, validity date and an optional upload of the report.
- If they haven't: they choose an alternative – being a national of a majority English-speaking country (shown only where their nationality qualifies), assessment based on a previous qualification (from those added in Education history), or another method they explain.
6. Employment
Lets applicants optionally add work experience and upload a CV.
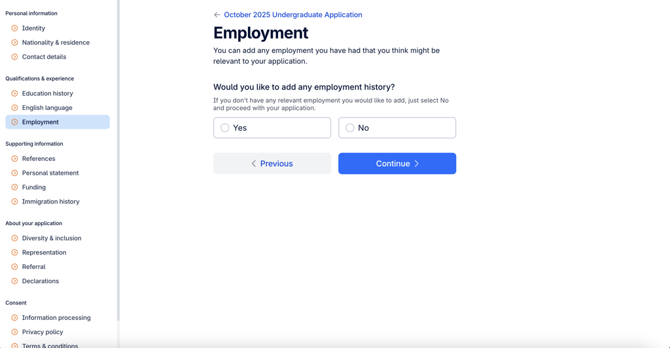
- The applicant first confirms whether they have employment history to add.
- If yes, they can upload a CV (optional) and add one or more employment entries – each with employer name, job title, country, address, employment type and start/end dates.
7. References
Manages referees and reference letters.
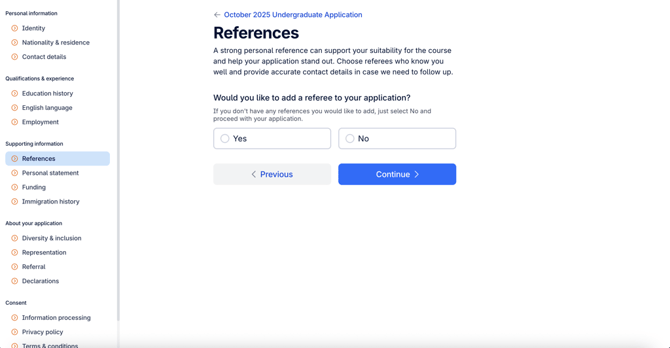
- The applicant confirms whether they'd like to add a referee.
- If yes, they can add one or more referees – with name, email, phone, address, country, occupation and employer – along with how the referee knows them and for how long, and an optional reference letter upload.
8. Personal statement
A simple upload task for the applicant's personal statement.
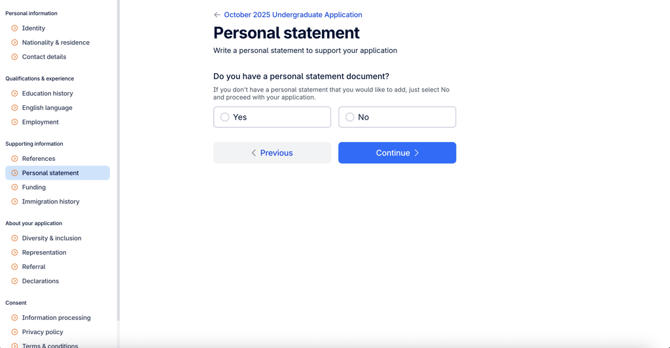
- The applicant confirms whether they have a personal statement document, and if so uploads a single file.
9. Research proposal
A simple upload task for a research proposal, where required for the programme.
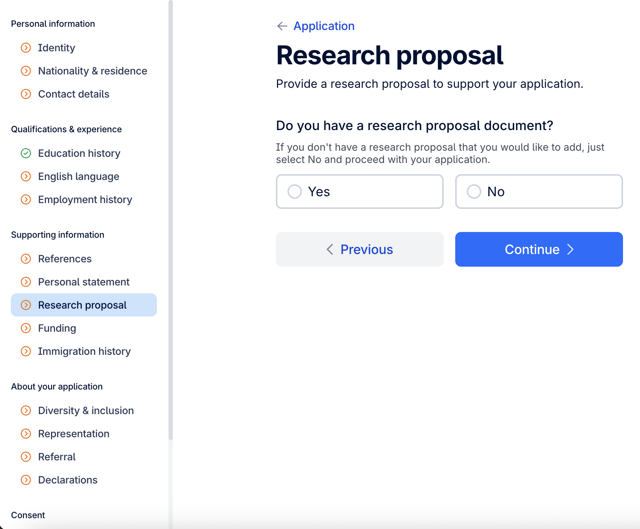
- The applicant confirms whether they have a research proposal document, and if so uploads a single file.
Whether this task appears depends on the university's configuration and the type of programme – for example, it may be enabled only for postgraduate research courses.
10. Funding
Captures the applicant's main source of funding.
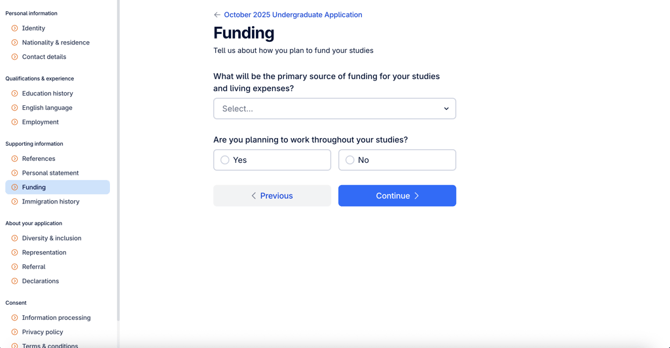
- All applicants select a primary source of funding (e.g. private finance, scholarship, overseas government). Choosing “Other” reveals a field to describe it.
- Home applicants also answer whether they've applied for Student Loans Company tuition fee funding and a maintenance loan.
11. Immigration history
Collects visa and immigration history. What's shown depends on fee status and nationality.
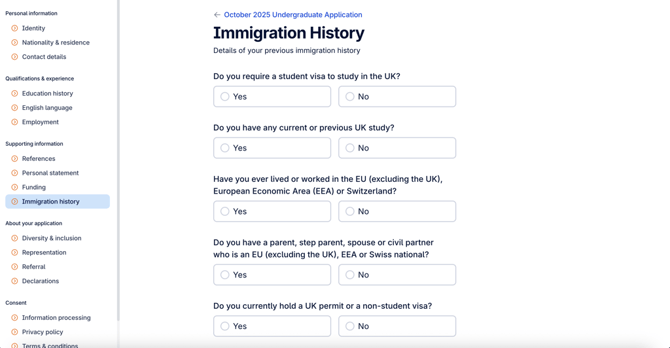
- Applicants may be asked whether they hold a UK permit or non-student visa (this is not shown for British and Irish nationals).
- Overseas applicants answer additional questions – whether they need a student visa, any current or previous UK study, and any previous UK or non-UK visa refusals – each with follow-up fields.
12. Diversity & Inclusion
Collects equal opportunities monitoring information. Some questions apply only to UK-domiciled applicants.
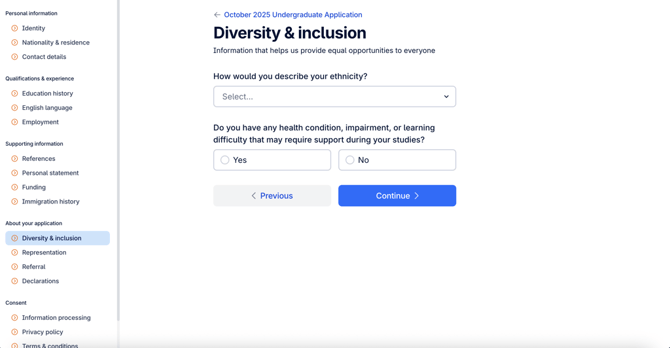
- For all applicants: ethnicity, and a checklist of disabilities or conditions (with an “Other” option).
- For Home applicants only: questions on the Disabled Students' Allowance, care history, educational background (last type of school, parents in higher education) and occupational background.
13. Representation
Identifies whether the applicant is being helped by a third party.
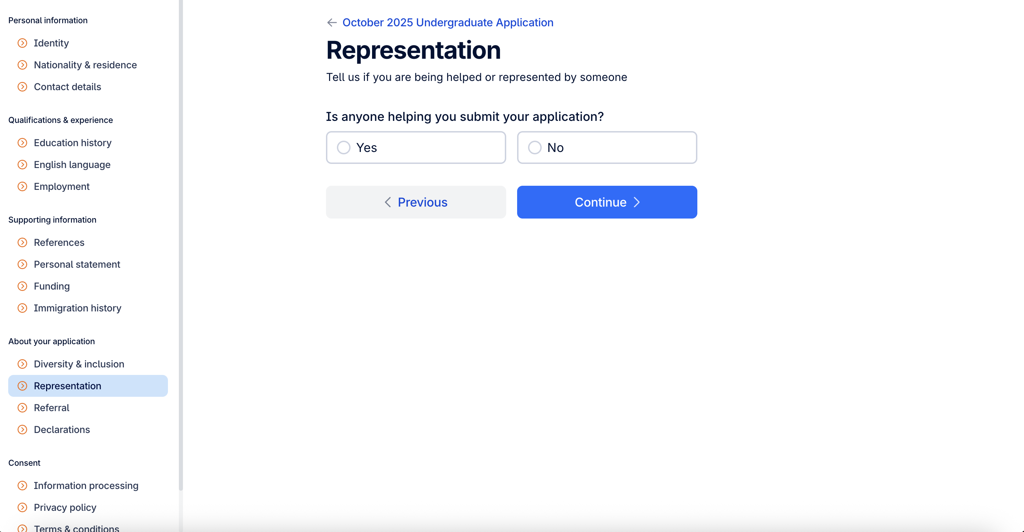
- If yes, they select who is helping (agency, family member, friend, school counsellor, teacher or other).
- Relevant follow-up fields then appear in the order options are selected – for example, selecting “Agency” asks for the agency name, agent name and agent email.
14. Referral
Captures how the applicant heard about the university and any previous history with it.
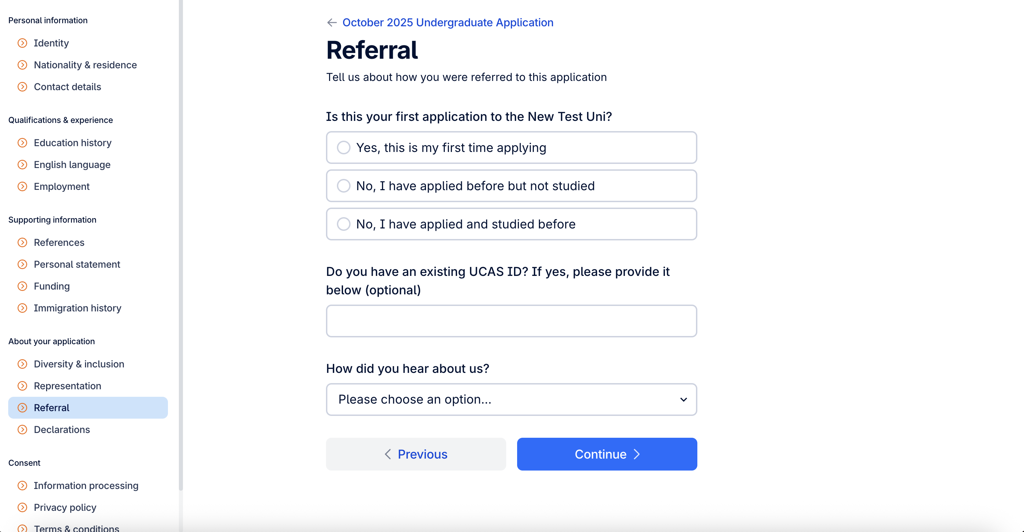
- Questions on whether this is their first application, with fields for previous application or student numbers.
- An optional UCAS ID field.
- A “how did you hear about us?” dropdown (e.g. agent, education fair, online search, social media, UCAS, university student). Selecting “university student” reveals a field for the referring student's name.
15. Declarations
Captures the applicant's declarations on interruption of studies and criminal convictions.
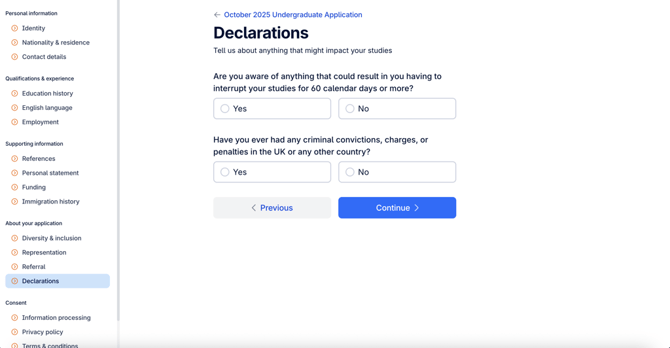
- Whether they're aware of anything that could interrupt their studies for 60+ days (a “yes” requires a reason).
- Whether they've had any criminal convictions, charges or penalties (a “yes” requires an explanation of the date and nature of the offence).
Whether the criminal convictions question and this task appear can vary by university configuration.
16–19. Consents
The final four tasks are mandatory consents the applicant must complete to submit:
- Information processing – permission for the university and Enroly to process their data to manage the application.
- Privacy policy – acknowledgement they've read the university's privacy policy (linked in the task).
- Terms & conditions – acceptance of the university's terms and conditions (linked in the task).
- Accuracy of data – a declaration that all the information provided is true and accurate.
20. Submit application
Once all tasks are complete and the account is verified, the application status becomes Ready and the Submit application button is enabled.
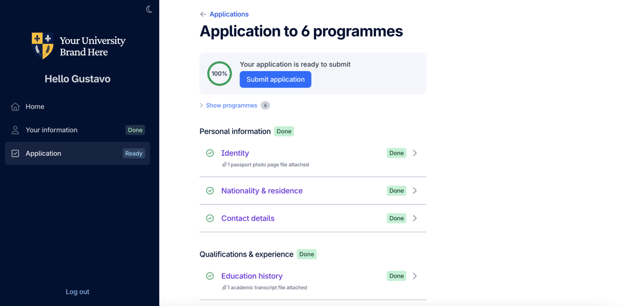
On submission:
- Both the Application and Your Information sections are permanently locked – no further edits or uploads are possible.
- The application status changes to Sent.
- A separate record is created for each programme choice (up to six) in the University View.
- The applicant's home page shows “No Outstanding Tasks” until the university triggers a new section, such as an Offer.